


PermalinkTable of Contents
- Introduction to Python
- What is Anaconda
- Introduction to Anaconda and python environment setup
- Getting started with Jupyter Notebook
- How Jupyter Notebook works?
- Open Jupyter Notebook
- Jupyter Notebook file structure
- Jupyter Notebook shortcuts
- Magic keywords in jupyter notebook
- Converting notebooks and creating slideshows
PermalinkIntroduction to Python
- Python is a high-level programming language used for general-purpose software engineering.
- Python is a server-side language.
- Developed in the late 1980s by Guido Van Rossum.
- Python is an open-sourced language, and in recent years has increased in popularity due to its use in data science.
- Python has a strong community around machine learning, data modeling, data analysis, and artificial intelligence (AI), with extensive resources and libraries built for these purposes.
PermalinkWhat is Anaconda
- Anaconda is an open-source distribution for python and R.
- Used for machine learning, data science, and deep learning.
- Easy-to-install package manager,
- Environment manager and
- Python distribution with a collection of 1,000+ open-source packages for free.
PermalinkIntroduction to Anaconda and python environment setup
PermalinkDownload Python
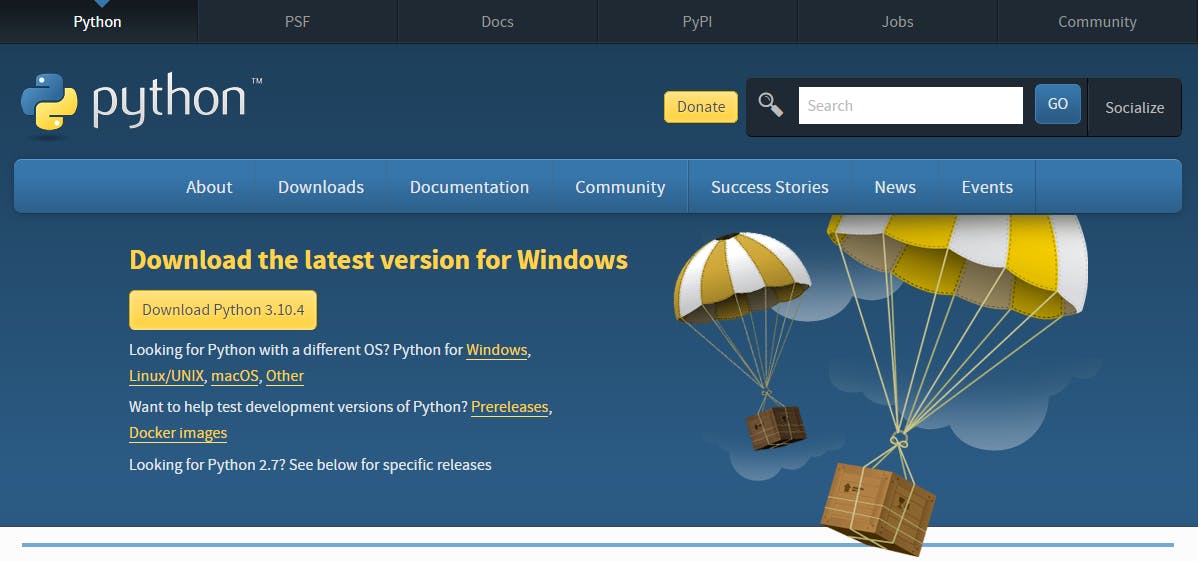
1 - By using the link, you can download python according to your machine. The following page will appear in your browser.
2 - Click the Download Python 3.10.4 button after this python.exe will start downloading. This file size is about 27 MB and will save in your Downloads folder.
PermalinkInstall Python
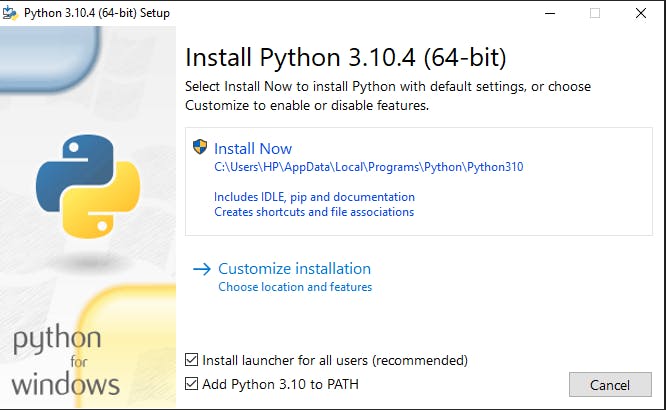
Double-click the icon labeling the file python-3.10.4-amd64.exe from Download.
A Python 3.10.4 (64-bit) Setup pop-up window will appear.
Ensure that both the Install launcher for all users (recommended) and the Add Python 3.10 to PATH checkboxes at the bottom are checked By clicking on Install Now it will start installing python.
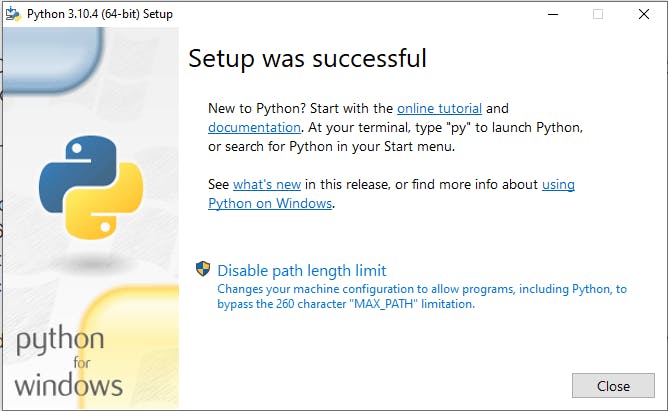
After installing the following screen will be shown:
PermalinkDownload and Install Anaconda
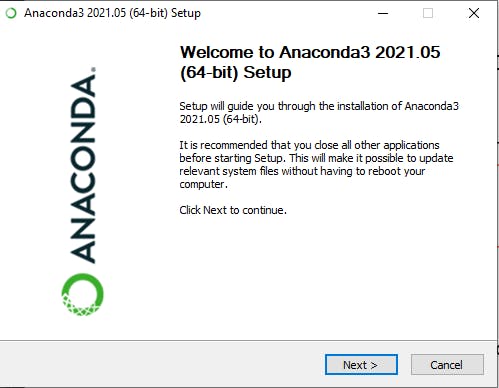
1- Once you complete the download, open the setup. A similar popup window will appear on your computer.
 2- Click on Next and then click on I Accept to agree to anaconda's terms and conditions.
3- Click on Install.
2- Click on Next and then click on I Accept to agree to anaconda's terms and conditions.
3- Click on Install.
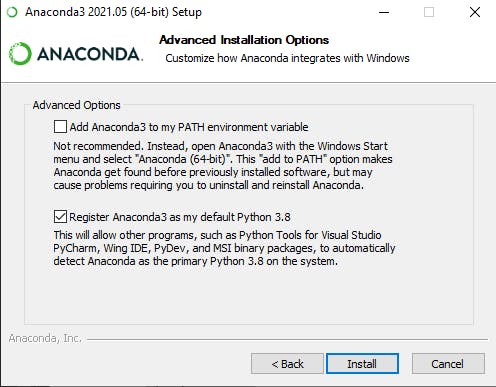 4- Open the Anaconda Prompt from the Windows start menu.
PermalinkGetting started with Jupyter Notebook
- Jupyter notebook is an open-source, interactive Integrated Development Environment (IDE).
- Allows you to write code, navigate files on your computer, inspect variables, and more.
- We can combine data, code, and visualizations into a single notebook, and create interactive “stories” that they can edit and share.
- It contains both computer code (such as Python) and other text elements such as paragraphs, markdown, figures, links, etc.
PermalinkHow Jupyter Notebook works?
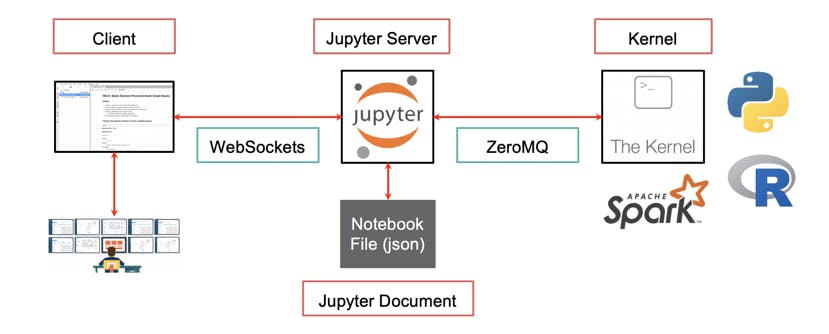
- Client: The Jupyter Notebook IDE launches in a web browser, where we write and send the code to the kernel using web sockets over a web server.
- Notebook Documents: The notebook file (.ipynb) is a file where Python code and Markdown text are saved in JSON format.
- Kernels: A kernel runs our code in a specific programming language. It supports over 40 different languages. In this course, we will use the Python kernel.
PermalinkOpen Jupyter Notebook
Open Jupter notebook by using anaconda navigator. The following window will appear:
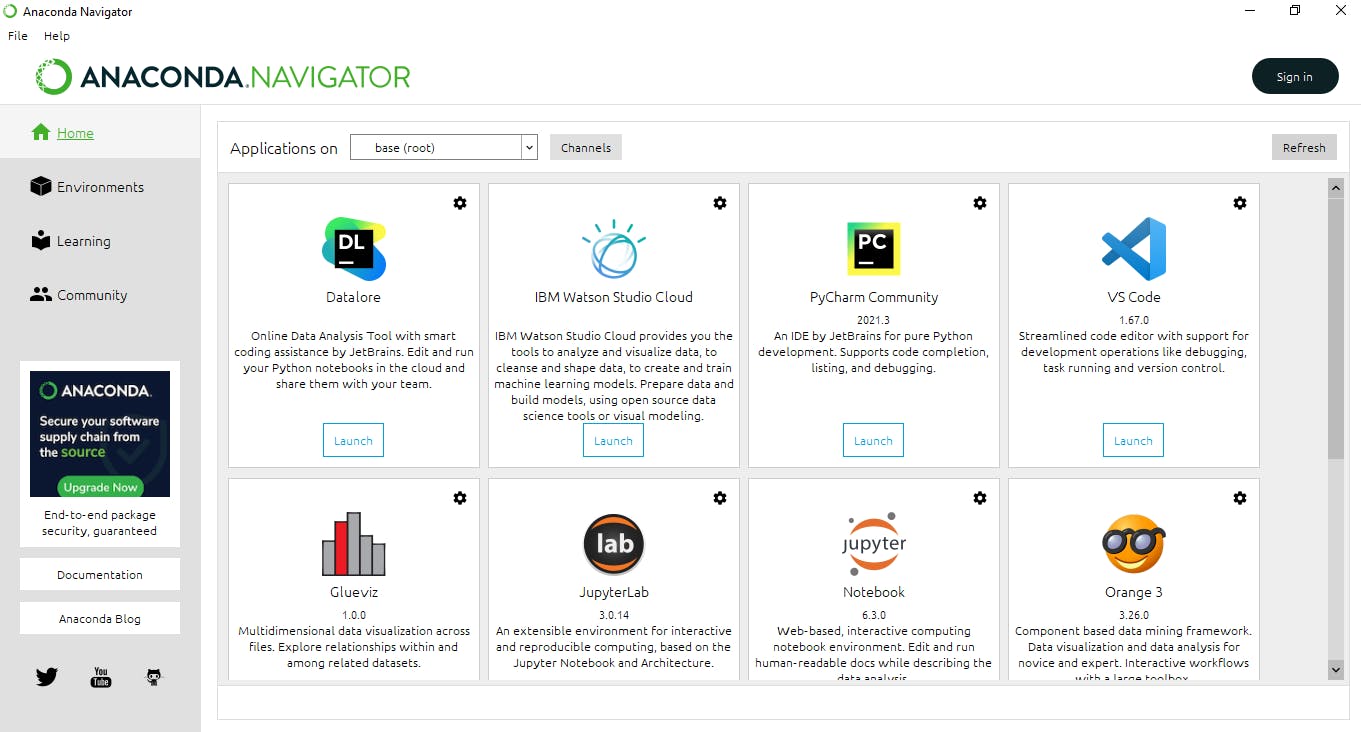 Click on the launch button for jupyter notebook, it will open in the default browser. Or you can directly open jupter notebook from the search bar it will open a Jupyter notebook prompt and direct you to the web page.
PermalinkJupyter Notebook file structure
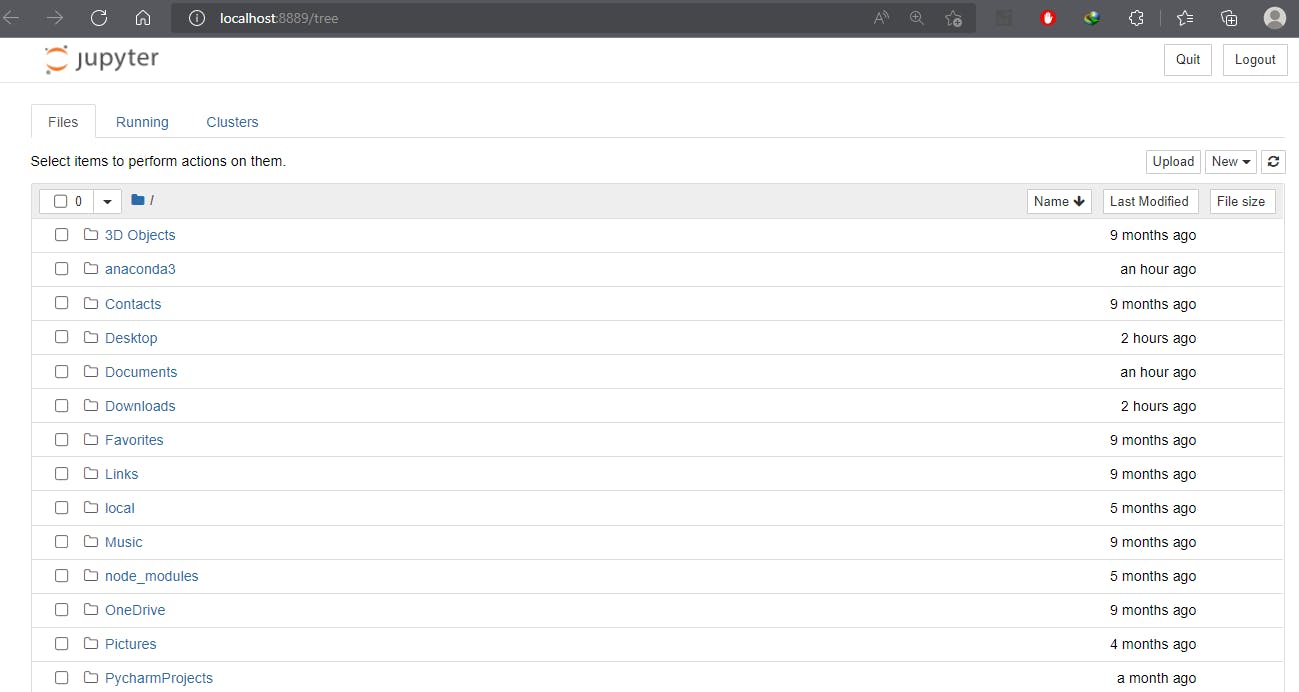
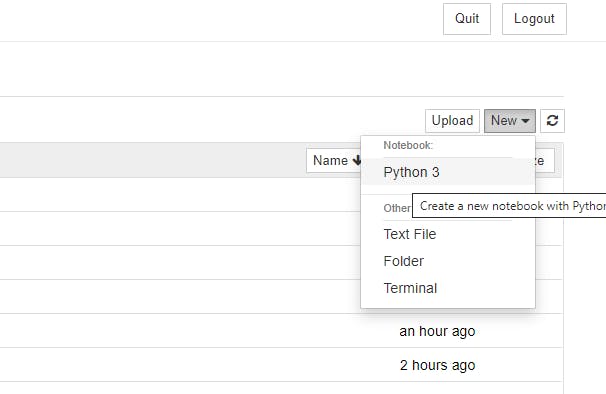
Jupyter notebook opens a window like the following:
- Click New and select python to start a new file.
- Click + to add a new code block.
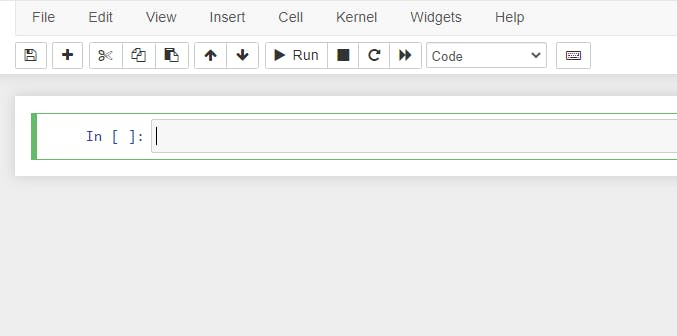
- Click Run to run the block.
- Code By selecting code from the dropdown as shown in the following image.
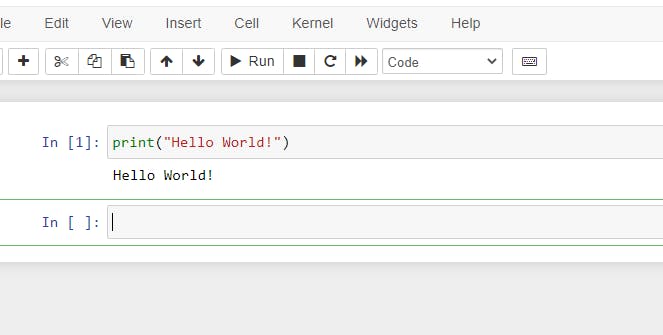
We will be able to write and execute python code in the cells.
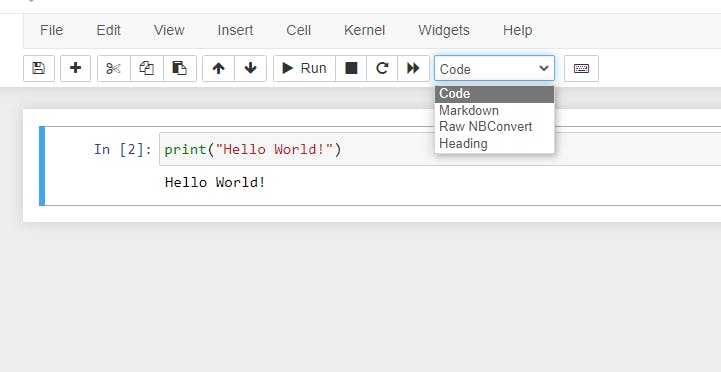
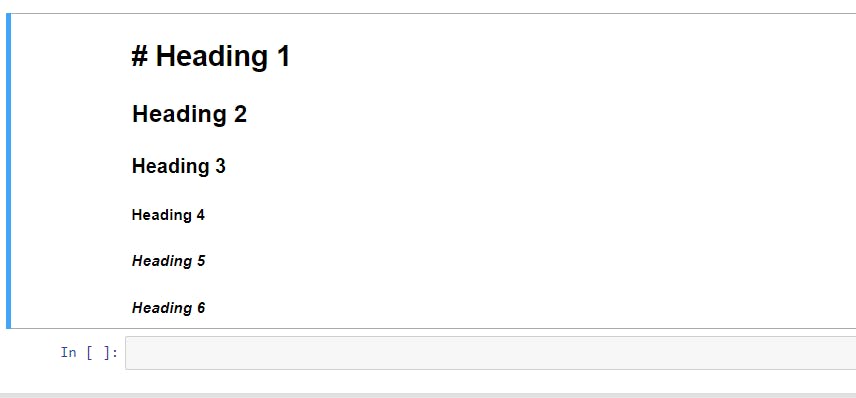
- Heading By selecting a heading from the dropdown we can add headings from h1 to h6 in the cells. We can add # before heading and the # increase with heading numbers like # for h1 and ## for h2.
- Markdown
Markdown is used for different purposes such as emphasizing text, writing HTML code, numbered lists, horizontal lines, graphics, colored code boxes, heading, and indenting.
PermalinkJupyter Notebook shortcuts
Shortcuts are used to quickly access a particular function. Following are some shortcuts to jupyter notebook:
- Create a new cell: To create a new cell enter Esc + a (above), Esc + b (below).
- Run Cell : To run cell enter Ctrl + enter or shift + enter to run and insert below.
- Go to Code : To enter code in the cell enter y.
- Go to Markdown: To enter markdown in the cell enter m.
- Add Heading: To add heading enter 1-6 to add different headings.
- Select cell: To select cell above enter k or ↑ key and to select below enter j or ↓ key.
- Insert cell: To insert in cell above enter a and for below enter b.
- Copy Paste cell: To copy cell use c key and to paste below use v and to paste above use shift + v.
- Delete cell and Undo Deletion: To delete a cell use d then d and to undo last deletion use z.
- Merge Cell: To merge multiple cells use shift + m
- Save and Checkpoint: Use Cntrl + s key to save and add checkpoints to a notebook.
- Indent and Dedent: Use Ctrl + ] key to add indent and to dedent use Ctrl + [ key.
- Split cell into two: To split a cell into parts use Cntrl +shift + - key.
- Find and replace: To find and replace in code use Esc + f key.
- Scroll up and down: Use space key to scroll down and to scroll up use scroll + space key.
- Interrupt and restart kernel: To interrupt the kernel use Esc + i then i and to restart kernel use Esc + 0 0.
PermalinkMagic Keywords in jupyter notebook
- What are magic keywords?
Magic keywords are those commands which let us perform a bunch of tasks from the jupyter notebook itself which developers need to do in the command prompt/shell. They are spotted easily as they are written by % if there is one line of code or by %% if there are several lines.
- %lsmagic
This command will execute all other magic commands that you can use in the jupyter notebook.
%lsmagic
It will print all the magic words we can use in a notebook.
%alias %alias_magic %autoawait %autocall %automagic %autosave %bookmark %cd %clear %cls %colors %conda %config %connect_info %copy %ddir %debug %dhist %dirs %doctest_mode %echo %ed %edit %env %gui %hist %history %killbgscripts %ldir %less %load %load_ext %loadpy %logoff %logon %logstart %logstate %logstop %ls %lsmagic %macro %magic %matplotlib %mkdir %more %notebook %page %pastebin %pdb %pdef %pdoc %pfile %pinfo %pinfo2 %pip %popd %pprint %precision %prun %psearch %psource %pushd %pwd %pycat %pylab %qtconsole %quickref %recall %rehashx %reload_ext %ren %rep %rerun %reset %reset_selective %rmdir %run %save %sc %set_env %store %sx %system %tb %time %timeit %unalias %unload_ext %who %who_ls %whos %xdel %xmode
- %store:
By using this command we will be able to pass variables from one notebook to other. I create a notebook and use the variable Notebook_1_va.
a = 1
b = 2
Notebook_1_var = a/b
%store Notebook_1_var
After this, I will create the new notebook and use this variable in the new notebook.
%store -r Notebook_1_var
new_var = Notebook_1_var +5
new_var
It will show output like the following.
5.5
- %who
This command will show all the variables present in a notebook.
%who
It prints all the variables in a notebook.
Person     Stg     String     add     addition     d1     distance     emp     name
num     p     string1
- %time
By using the time command we can check the time the execution of the code takes.
%%time
class adds:

    def __init__(self, word1):
        self.word1 = word1

    # print our string object
    def __repr__(self):
        return self.word1

    def __add__(self, word2):
        return self.word1 + word2

p = add("Hello")
print(repr(p + " World"))
The output will look like the following.
'Hello World'
Wall time: 9.73 ms
- %%writefile
By using this command we can write the content of the jupyter notebook file to some other file.
%%writefile new.py
class Person:

    def __init__(self, word1, word2):

        self.word1 = word1
        self.word2 = word2
    # print our string object
    def __repr__(self):
        return self.word1 + self.word2

    def __add__(self):
        return self.word1 + self.word2

    def __len__(self):
        return len(word1)
This will create a new file in the same directory.
Writing new.py
- %pinfo
By using this command we can check what are the details of the objects that are stored in the particular variable name.
%pinfo name
The output will look like the following.
Type:        String
String form: <__main__.String object at 0x0000024C8E83D5B0>
Docstring:   <no docstring>
- %run
By using the run command we can run another file in a jupyter notebook, and it will show the output of that file.
%run new.ipynb
They will show the following output:
The Value of P is:  5
The Value of G is:  7
The Private Key a for Alice is:  15
The Private Key b for Bob is:  13
The secret key for the Alice is:  3.0
Secret Key for the Bob is:  3.0
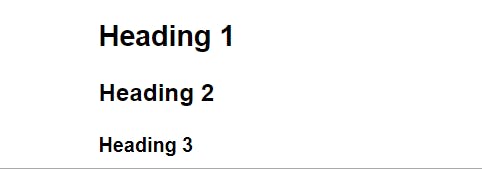
- %%html
By using the HTML command the contents of the cell in the jupyter notebook will be rendered as HTML. We can use HTML tags as input and it will render them as HTML.
%%html

<h1>Heading 1</h1>
<h2>Heading 2</h2>
<h3>Heading 3</h3>
The output looks like following:
- Get and Set Environment Variables
By using the %env command we can get a list of environmental variables.
%env
This will look like the following:
'PATH': 'C:\\Users\\HP\\anaconda3\\anaconda;C:\\Users\\HP\\anaconda3\\anaconda\\Library\\mingw-w64\\bin;C:\\Users\\HP\\anaconda3\\anaconda\\Library\\usr\\bin;C:\\Users\\HP\\anaconda3\\anaconda\\Library\\bin;C:\\Users\\HP\\anaconda3\\anaconda\\Scripts;C:\\windows\\system32;C:\\windows;C:\\windows\\System32\\Wbem;C:\\windows\\System32\\WindowsPowerShell\\v1.0\\;C:\\windows\\System32\\OpenSSH\\;C:\\Program
We can also set an environmental variable in the notebook by specifying the variable name and its value. I created a new environmental variable called NEW_ENV :
%env NEW_VAR=C:\\Users\
%env NEW_VAR
In the above code, I created a new environment variable and then check the newly created variable.
'C:\\\\Users\\'
PermalinkConverting notebooks and creating slideshows
By using slide shows in the jupyter notebook we can use our code in a presentable format. For this, we need to install the rise package. Use the following command to install the rise package.
pip install RISE

OR

conda install -c conda-forge rise
After installing click on “View” in the notebook then hover over “Cell Toolbar” in the “View” menu and click on “Slideshow” in the “Cell Toolbar” menu. This will looks like following:
 Each Slide type has different options like the following:
1- slide - indicates that the cell should be the start of a new slide.
2- sub-slide - indicates that the cell should be the new sub-slide at the start, it will appear in a new frame beneath the previous slide.
3- fragment - it will get added to the current Slide or Sub-Slide on the next arrow.
4- skip/notes - it will not be a part of the slideshow.
5- - - it will appear at the bottom of the Slide/Sub-Slide and will follow the behavior of the last execution of the Slide or Sub-Slide.
You can create a slideshow by using Alt + r or clicking the top-right icon like from the following image.
Each Slide type has different options like the following:
1- slide - indicates that the cell should be the start of a new slide.
2- sub-slide - indicates that the cell should be the new sub-slide at the start, it will appear in a new frame beneath the previous slide.
3- fragment - it will get added to the current Slide or Sub-Slide on the next arrow.
4- skip/notes - it will not be a part of the slideshow.
5- - - it will appear at the bottom of the Slide/Sub-Slide and will follow the behavior of the last execution of the Slide or Sub-Slide.
You can create a slideshow by using Alt + r or clicking the top-right icon like from the following image.
PermalinkConclusion
This article covered the basic method to download and install python and anaconda setup that'll help get you started using Jupyter Notebook. By the end of this article, I hope you will be able to use Jupyter Notebook on your local machines.
Subscribe to our newsletter
Read articles from Hunnar Blog directly inside your inbox. Subscribe to the newsletter, and don't miss out.

